Crocs, the iconic foam rubber footwear, have become a canvas for those looking to express their unique style. But can you spray paint Crocs to infuse them with a personal touch? The answer isn’t straightforward.
Traditional fabric dye proves ineffective on Crocs, failing to adhere well to the foam rubber material. Similarly, spray painting, though a tempting quick fix, leads to disappointment as the paint tends to crack and peel quickly.
So, what’s the solution for those desiring a vibrant makeover for their Crocs? The answer lies in the innovative technique of hydro-dipping or water transfer painting. This method ensures a lasting color transformation and opens up a world of creative possibilities for your beloved Crocs.
Key Takeaways
- Crocs are made from a unique closed-cell resin material called Croslite, which is lightweight, durable, and water-resistant.
- Proper cleaning techniques for Crocs include using warm water, mild soap, and a soft-bristled brush.
- When spray painting Crocs, it is important to choose spray paint specifically designed for plastic surfaces and to apply thin, even layers of paint.
- Adding a clear topcoat after painting provides added protection and extends the lifespan of the Crocs.
Understanding Crocs Material Composition

Crocs stand out in the footwear world, not just for their distinctive design but also for their unique material composition. These popular shoes are made from a proprietary closed-cell resin called Croslite.
This material is neither plastic nor rubber but a foam resin with remarkable properties. Croslite is lightweight, non-toxic, and incredibly soft, providing the signature comfort Crocs is known for.
It’s like walking on a cloud, one that supports and cushions every step you take. So, while you might be keen to change the color of your Crocs with spray paint, remember it’s the Croslite that’s the real star here.
Additionally, it offers excellent grip and is resistant to odors, making it ideal for long-term wear. Croslite is thermoplastic, soft and cushy, providing a level of comfort that’s hard to beat.
The composition of Croslite presents both advantages and challenges when it comes to customization. Its smooth, pore-free surface resists typical dyes and paints, explaining why conventional fabric dyes and spray paints fail to adhere to or last on Crocs effectively.
This resistance to common coloring methods is due to the non-porous nature of Croslite, which prevents the absorption of liquid-based substances.
Understanding this material composition is key to exploring appropriate and effective methods for personalizing Crocs, leading to the popularity of techniques like hydro-dipping, which work in harmony with the unique characteristics of Croslite.
Necessary Supplies for Painting Crocs
Before we set our creative energies loose, let’s gather our arsenal to spray paint those Crocs. We’ll need the right type of paint, and Pintyplus Basic enamel spray paint is top on our list, along with Pintyplus spray plastic primer to prepare the Crocs surface.
We shouldn’t forget the kitchen paper, cling film, and delicate masking tape for a clean and precise painting process.
Choosing Your Paint Type
When it comes to transforming your Crocs with a splash of color, it’s crucial to pick out spray paint that’s specifically designed for plastic surfaces. This ensures a strong bond between the paint and your Crocs, creating a durable and long-lasting finish.
Additionally, you’ll want to consider the type of finish you desire. Do you want a sophisticated matte or a shiny glossy look? The choice is yours.
It’s also worth checking if the spray paint is waterproof and resistant to fading. You wouldn’t want your newly painted Crocs to lose their charm, would you?
Opt for quick-drying spray paint for convenience, and don’t forget to read reviews and recommendations. Remember, choosing your paint type is a vital step when you’re planning to paint Crocs with spray.
Preparing Your Crocs
Gearing up to add a pop of color to your Crocs, it’s important to gather all the necessary supplies to ensure a flawless finish and lasting durability. We’d recommend Pintyplus enamel spray paint and a Pintyplus plastic primer and spray varnish. Don’t forget a permanent black marker for those creative details.
Start by preparing your Crocs – a good cleaning with soap and water is essential. Once dried, remove any accessories and give the surface a light sanding for better paint adhesion.
Now you’re set to spray! Remember, shake the can well, keep it at a distance, and apply in thin, sweeping layers.
Finally, let your newly spruced-up Crocs dry completely before strutting your stuff.
Enjoy your vibrant, personalized footwear!
Application and Drying Process
Ready to dive into the colorful world of spray painting Crocs?
Let’s start gathering the essential materials – Pintyplus Basic enamel spray paint, Pintyplus spray plastic primer, kitchen paper, cling film, delicate masking tape, Pintyplus spray varnish, and a permanent marker for those unique, personal touches.
Here’s a table with a step-by-step guide of the application and drying process:
| Step | Material | Instruction |
|---|---|---|
| 1 | Pintyplus spray plastic primer | Apply an even coat and allow the Crocs to dry |
| 2 | Pintyplus Basic enamel spray paint | Apply thin, even layers, allowing each to dry |
| 3 | Pintyplus spray varnish | Apply for an additional layer of protection |
| 4 | Permanent Marker | Add personal touches |
Safety Precautions Before Spray Painting
Before we dive into the art of spray painting Crocs, we must lace up our safety boots first, ensuring we’re well-equipped with gloves, respirators, and eye protection to shield ourselves from pesky paint fumes and particles. This is the first rung in the ladder of safety precautions before spray painting.
While hydro-dipping is the recommended method for coloring Crocs, those who choose to experiment with spray paint should be aware of the necessary precautions:
- Ventilation: Spray paint emits fumes that can be harmful if inhaled in enclosed spaces. Ensure that you work in a well-ventilated area, preferably outdoors, to avoid inhaling toxic fumes.
- Protective Gear: Wear protective gear such as gloves, goggles, and a mask. This gear will shield your skin and eyes from spray particles and fumes, and prevent inhalation of harmful chemicals.
- Surface Preparation: Crocs’ smooth surface can make paint adherence challenging. If you proceed with spray painting, lightly sanding the surface can help the paint adhere better. However, this could damage the integrity of the shoe material.
- Test Patch: Before fully committing to painting your Crocs, test the spray paint on a small, inconspicuous area. This will help you understand how the paint adheres and dries on the Croslite™ material.
- Follow Instructions: Adhere strictly to the instructions on the spray paint can. Different paints may have specific application methods and drying times.
- Disposal of Materials: Properly dispose of any used paint cans or materials. Spray paint cans are pressurized and can be hazardous if not disposed of correctly.
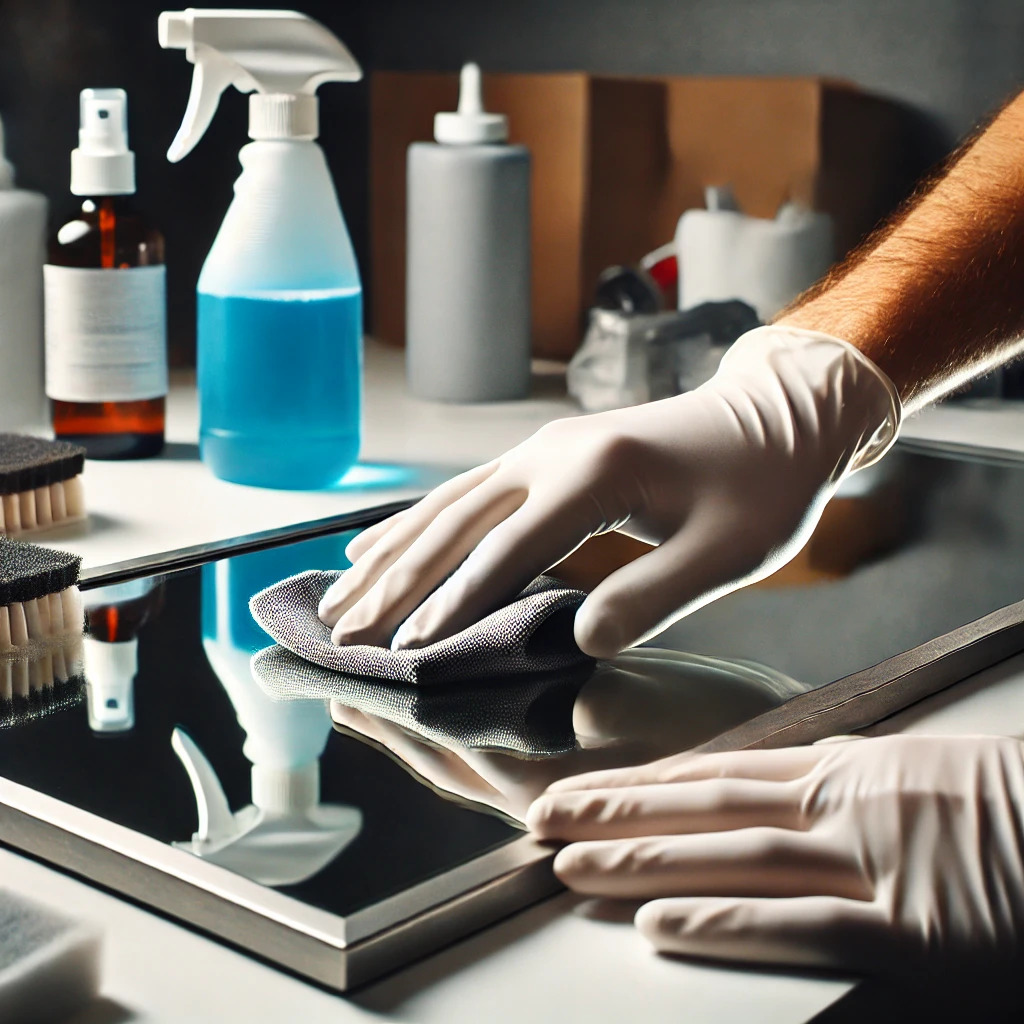
Proper Cleaning Techniques for Crocs

Before we start splashing color onto our Crocs, let’s ensure they’re squeaky clean.
From choosing the right cleaning supplies to the step-by-step process of scrubbing, we’ll guide you through the nuances of prepping your Crocs for a painting makeover.
Prepping Crocs for Painting
To ensure our Crocs’ longevity and vibrant color, we’ll need to dive into the art of proper cleaning techniques, prepping them meticulously for the painting process. If you’re wondering, “Can you spray paint Crocs?”, the answer is a resounding yes! An old pair of Crocs can be transformed with a bit of love and preparation.
Here’s a quick guide for prepping Crocs for painting:
| Steps | Materials | Instructions |
|---|---|---|
| Step 1 | Warm Water | Clean your Crocs with warm water to remove any loose dirt. |
| Step 2 | Mild Soap | Apply the soap to cleanse the shoe further. |
| Step 3 | Soft Brush | Use the brush to scrub off any stubborn stains. |
| Step 4 | Rinse and Dry | Rinse thoroughly and let them dry completely before painting. |
With these steps, you’ll ensure the paint adheres well and your Crocs shine brightly.
Choosing Cleaning Supplies
Let’s delve into the specifics of selecting the right cleaning supplies that will ensure our Crocs are pristine and ready for their transformation. We know that summer is the season when our beloved shoes come out to play, but before they can sparkle in the sun, they need a good clean.
First, we’ll need a soft-bristled brush to scrub away any dirt gently.
Next, a simple solution of mild detergent and warm water will suffice for most cleaning tasks. Remember, it’s important to rinse thoroughly to avoid leaving any soap residue.
Finally, since Crocs have a knack for attracting water, they must dry quickly and completely before painting.
With these supplies in hand, our Crocs will be ready for their radiant makeover.
Cleaning Process Step-by-Step
Kicking off our Crocs cleaning journey, we initially stripped them of any accessories or detachable parts, making sure they were bare and ready for a thorough wash.
We scrub them down with a soapy mix, rinsing off the grime and grit.
Our next step in this cleaning process step-by-step tutorial is to use rubbing alcohol for removing any lingering residue or oils.
Now, we’re ready to answer the question, can you spray paint Crocs? Absolutely, but first we let them dry completely.
We apply a base coat of white acrylic paint to ensure our paint job stands the test of time.
As we step into the world of color and creativity, we remember to seal our masterpiece with a protective layer, ensuring the longevity of our newly designed Crocs.
Step-by-Step Guide to Spray Painting Crocs

Post-Painting Care for Your Crocs
After giving your Crocs a vibrant makeover, it’s crucial to know how to maintain their new look. Post-painting care for your Crocs is as important as the painting process itself. So, can you spray paint Crocs and keep them looking fabulous? Absolutely, but you’ll need to take some steps to ensure their lasting appeal.
Firstly, don’t rush into wearing your freshly painted Crocs. Let them dry completely, giving the paint a good chance to set. This patience will ensure a solid and long-lasting finish.
Next, apply a clear topcoat. This shields your artwork from the elements and prevents chipping, securing your Crocs’ totally new look.
Cleaning should be done gently, using mild soap and water. Avoid the temptation to plunge them into water or use harsh chemicals. This could fade or deteriorate the paint, diminishing the vibrancy of your masterpiece.
Lastly, dodge excessive heat or sunlight exposure and store your Crocs in a cool, dry place. This will sustain the longevity of the design and keep your Crocs looking as flamboyant as the day you painted them.
Common Mistakes to Avoid While Painting

Painting Crocs can be a creative and enjoyable endeavor, but it’s easy to make mistakes, especially given the unique nature of their material. Here are some common pitfalls to avoid:
- Skipping Surface Preparation: Not properly preparing the surface of the Crocs can lead to poor paint adhesion. Always clean and lightly sand the surface before painting.
- Using Incompatible Paint: Using regular spray paint not meant for plastics or rubber can result in a finish that cracks and peels. Opt for paint specifically formulated for use on plastics.
- Overlooking Primer and Sealer: Skipping the primer can prevent paint from sticking, while neglecting the sealer can leave your paint job unprotected and prone to damage.
- Applying Thick Coats of Paint: Applying paint too thickly can cause drips and uneven drying. Instead, use multiple thin coats, allowing each to dry before applying the next.
- Painting in Poor Conditions: Avoid painting in extreme temperatures or high humidity, as these can affect how the paint dries and adheres.
- Ignoring Safety Precautions: Not wearing protective gear or painting in a poorly ventilated area can be hazardous to your health.
- Impatience with Drying Time: Not allowing enough drying time between coats and before using the Crocs can ruin your paint job.
- Neglecting to Mask Properly: Failing to use masking tape to protect the soles or other areas can result in a messy, unprofessional look.
- Forcing the Process: Remember, spray painting may not be the most effective method for Crocs due to their material. If you encounter persistent issues, consider alternative methods like hydro-dipping.
Conclusion
So, are you still doubtful about spray painting your Crocs? Don’t be! We’ve just shown you how simple giving your old Crocs a colorful makeover can be.
All you need is the right supplies, a bit of patience, and a splash of creativity.
Remember, it’s not only about reviving your worn-out Crocs but also about showcasing your unique style.
So, go ahead and start transforming your Crocs into your personalized fashion statement today!
Related Posts